Wednesday, August 14, 2013

Know Your Common Garden Blooms

Today we're playing everyone's favorite game... Know Your Common Garden Blooms. Here's how it works:

  • I post three close-up photos of three common garden plant blooms and you try to guess the plant.
  • There are three simple rules: 
    • There are no prizes, 
    • you are either right or wrong, 
    • I eat all the raspberry's (hint: one of the blooms may be a raspberry bloom)
You can attempt to answer in the comment section below. The blooms will be labeled A, B (is a little tricky, because it hasn't bloomed yet, but it was an amazing photo so I added it to the contest), or C. You give your answer accordingly. Good luck everyone, I'll  be eating my raspberry's on top of some ice cream.

A

B

C

Friday, August 2, 2013

Sunday, May 26, 2013

Greenhouse Project

I've been working on a greenhouse for several years. Most of it has been in this condition for the past two years. This was a result of over buying for fence repair and plans to make a greenhouse with leftover and salvaged material. In the background (to the right of the greenhouse) is the produce from planting spinach and snow peas this past February.
I stopped by a garage sale two years ago that had windows for FREE. I picked up four windows. I've been using them on 'lean-to' boxes until yesterday.
I began attaching the windows to the frame of the green house. I will likely have to finally purchase some material for the greenhouse to put on a roof and door. 

Yesterday, I was able to get the southeast and southwest facing windows in place. There are several things I'll need to work on to make it a functioning greenhouse.
More updates to come as the project continues. Thus far, I've used only leftover and salvaged material and hardware.

Tuesday, May 14, 2013

Spring Blooming

A few warm days have produced some blooming action in the garden. Here are some close ups.


Monday, May 13, 2013

Pallet Garden

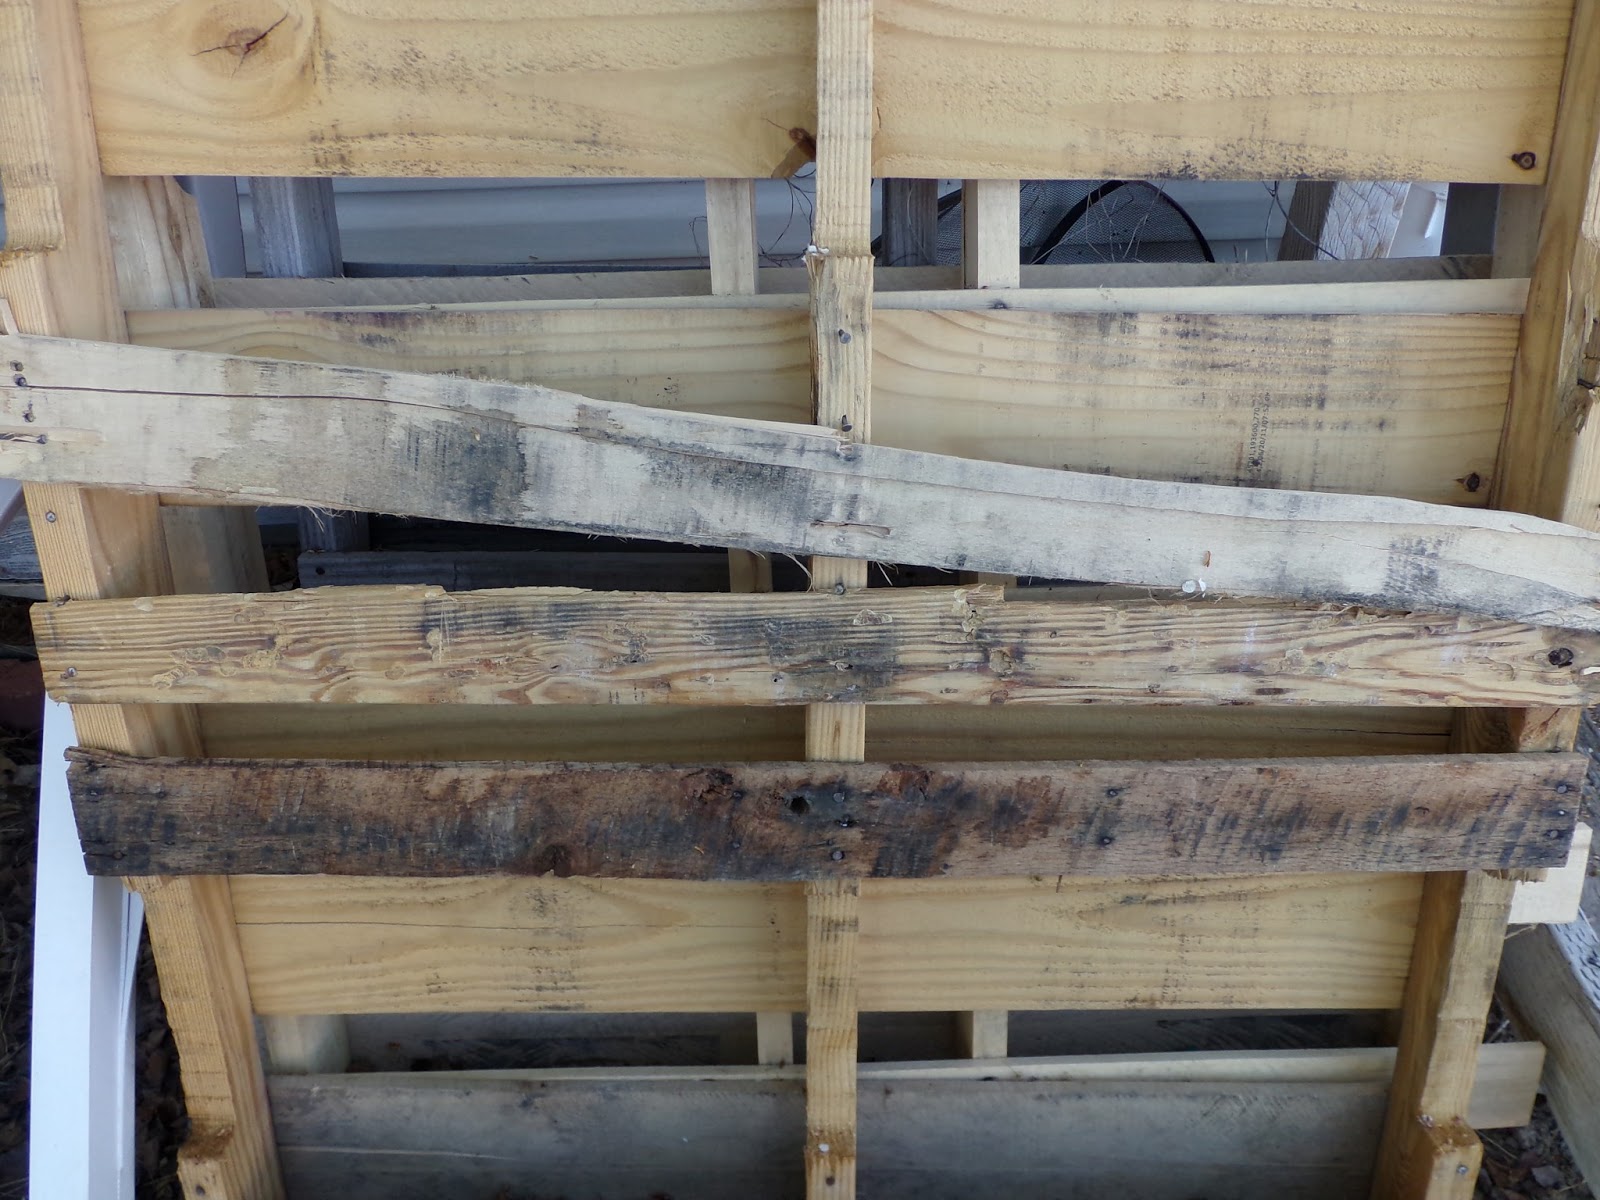
I'm currently working on various versions of 'alternative' gardening. This project is made from old shipping pallets. There are old shipping pallets everywhere and most of them can be claimed completely free. This is a first attempt of a raised garden. I finished the frame work tonight. I'll begin working on the inner components later this week.

This is made from two different sized pallets. One large and one small (this is why it is rectangular).
I started by cutting the large pallet in half and taking the small pallet apart for the two smaller ends

I pre-drilled holes (because pallet wood is hard and tends to split easily) and then screw the pieces together for a 20 inch high raised garden. I then lined the inside lower half with plywood (this too was salvaged plywood). I will eventually make this raised garden into a self watering garden. Similar in theory to the 5 gallon bucket planter I made last month. Then, after all parts were screwed into place I covered the entire raised garden box with linseed oil.

***NOTE***
only use pallets marked with HT (Heat Treated). Never use a pallet for gardening marked with CT (Chemical Treated).

I'll let the pictures tell the story.


Saturday, April 6, 2013

Grow Bucket

I always want to have a tomato before it's time to plant them outside. This is a new experiment to get a tomato started sooner. I had recently read about gardeners who grow plants in 5 gallon buckets. So I made an attempt of it myself. (A Google search for "grow box" will show where I got the idea).

Here are photos of the grow bucket project with a few details. Feel free to ask any questions.
5 gallon bucket, made in the USA

I made two cuts in the lid.
first one was 3/4 inch from the end.
second one in the center.

I started with a clay pot. see next picture.

I abandoned the clay pot and decide to use a plastic pot.


plastic pot for wicking process. (see coming photos)

I drilled more holes for the wicking process.

This is the cut out of the lid to the 5 gallon bucket. The
plastic pot is now in the center. The next photo will show
that this is placed in the bottom of the bucket.

This is now in the bottom of the bucket. Eventually I filled
the pot and bucket with soil. leaving the bottom 6 inches empty
for water to sit in and wick up to through the soil to the plant. 


I cut a a piece of tubing and secured it to the side of the bucket
to fill with water.

the pot in the bottom sits on the bottom of the bucket. I also
cut holes in the lid cutout for more wicking.


full of soil.

plastic bag for weed control and heat.

I placed the lid ring on the bucket to hold the plastic
bag in place

I then trimmed the plastic bag and cut an X in the plastic bag
to place the tomato plant into the bucket.

finished and ready for water

I did realize that I needed to drill a small overflow hole at the soil
line between the soil and water. I needed to do this so I
don't over fill the bucket.

Here is the overflow hole.

I have the bucket on this roller to move the bucket in and
out of the garage during the frosty nights and warm sunny days.