Saturday, April 6, 2013

Grow Bucket

I always want to have a tomato before it's time to plant them outside. This is a new experiment to get a tomato started sooner. I had recently read about gardeners who grow plants in 5 gallon buckets. So I made an attempt of it myself. (A Google search for "grow box" will show where I got the idea).

Here are photos of the grow bucket project with a few details. Feel free to ask any questions.
5 gallon bucket, made in the USA

I made two cuts in the lid.
first one was 3/4 inch from the end.
second one in the center.

I started with a clay pot. see next picture.

I abandoned the clay pot and decide to use a plastic pot.


plastic pot for wicking process. (see coming photos)

I drilled more holes for the wicking process.

This is the cut out of the lid to the 5 gallon bucket. The
plastic pot is now in the center. The next photo will show
that this is placed in the bottom of the bucket.

This is now in the bottom of the bucket. Eventually I filled
the pot and bucket with soil. leaving the bottom 6 inches empty
for water to sit in and wick up to through the soil to the plant. 


I cut a a piece of tubing and secured it to the side of the bucket
to fill with water.

the pot in the bottom sits on the bottom of the bucket. I also
cut holes in the lid cutout for more wicking.


full of soil.

plastic bag for weed control and heat.

I placed the lid ring on the bucket to hold the plastic
bag in place

I then trimmed the plastic bag and cut an X in the plastic bag
to place the tomato plant into the bucket.

finished and ready for water

I did realize that I needed to drill a small overflow hole at the soil
line between the soil and water. I needed to do this so I
don't over fill the bucket.

Here is the overflow hole.

I have the bucket on this roller to move the bucket in and
out of the garage during the frosty nights and warm sunny days.


Saturday, February 23, 2013

Monday, February 18, 2013

2013 Winter Garden

Today (February 18, 2013) I planted snow peas and spinach on the south side of the house. This is a time lapse of the planting process.

Friday, July 1, 2011

2011 Farm Update

notice the 32 oz Sonic
Happy Hour Drink
It has been nearly a month since the last update. Temperatures have continued to be relatively cool, however the past week we have seen temperatures in the upper 80s and even a few 90s. This has helped spur on some growth.

I thought I would give some attention today to the PVC watering sticks I use for my tomatoes.

I bought four, eight foot long, 1 and 1/2 inch wide PVC pipes. I cut them in half and put an end cap on the one end of each four foot long pipe. Then I drilled a 1/16 inch hole at the base of each section. Each four foot section holds just under 2 liters of water. This allows a slower watering of the tomatoes and allows the water to seep into the ground around each tomato plant. I water each plant every other day. This also allows me to add liquid fertilizer to each plant as needed. I have eight watering sticks and 16 tomato plants with home made tomato cages. All costing approx $6.50.

Following are some pictures of the watering in process.


Progress on the other plants are coming along, slowly. Strangely, the weeds do well with hot, cool, wet, and dry weather.
Sweet Corn
New Mexico, Hatch Chili Pepper

Sunday, June 5, 2011

Planting

It has been a very long spring. Cool temps are still the norm but the rain has begun to slow and the garden plot (my farm) at the College of Southern Idaho has dried out enough to begin planting. Here are some pictures from today. I now have half of my tomato plants in the ground and most of my (New Mexico) Hatch Peppers.

(1st Picture)
This is 10 tomato plants with PVC watering sticks. I'll explain in better detail soon.

(2nd Picture)
My 25 X 50 plot (#23) facing South


(3rd Picture)
Hatch Peppers

Saturday, April 9, 2011

Thursday, April 7, 2011

April (snow) Showers

“For as the rain and the snow come down from heaven and do not return there but water the earth, making it bring forth and sprout, giving seed to the sower and bread to the eater,  so shall my word be that goes out from my mouth; it shall not return to me empty, but it shall accomplish that which I purpose, and shall succeed in the thing for which I sent it.
Isaiah 55:10-11 (ESV)

----------------------------------------------------------------
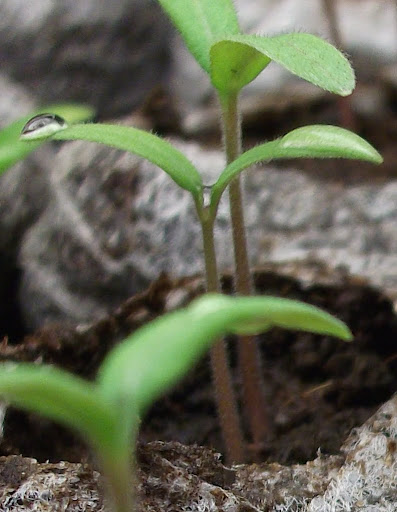
Weather report for April 7, 2011: This morning we woke up to approx 2.5 inches of fresh snow. Tonight I found the tomatoes have spouted. I missed taking a picture on Wednesday and missed the transition picture from seed to sprout. (I also bumped the GardenCam while examining the plants.)

April 2, 2011
April 7, 2011

Current temperatures:
Outside: 35 degrees F
Inside:    60 degrees F

Tuesday, April 5, 2011

Cucumbers Sprout First

In just five days the cucumbers have sprouted first.
High Temp: 43
Low Temp: 31
Indoor Temp: 70

Sunday, April 3, 2011

Observing the Seedlings

Day 2, April 3, 2011: no noticeable growth yet. (I'm not surprised, I just want to know what's going on in there.)

High Temp: 48
Low Temp: 29
Indoor Temp: 68
g

Saturday, April 2, 2011

April 2, 2011: GardenCam

Current outside temperature in Twin Falls, Idaho on April 2, 2011 is 39: Expected low of 28. Inside temperature in the state-of-the-art Bully Barn 58. Seeds are planted for tomato, cucumber, snow pea, and a large variety of flowers are planted, watered and under the light. This year I invested in a $15 ArcSoft webcam to mount next to the Jiffy planters so I can take random photos from the same location and watch the seedlings sprout. I will post some random snap shots. I will attempt a time lapse photography over the next several weeks as they grow. I will secure plot 23 at the College of Southern Idaho's community garden this coming week.

Here is the first snapshot form the GardenCam.


I will feature one of my favorites, the cherry tomato.
I don't see anything growing yet.

Monday, September 20, 2010

Tater Soup

Tonight, while at the "farm", I got a craving for potato soup, salsa and watermelon. So I dug up a bag full of taters, tomatoes, onions, peppers and tucked a melon under my arm and headed home. When Renee arrived home she promptly googled a potato soup recipe (I made a few adjustments) then I started washing the produce. Then a few hours later we were eating a nearly completely home grown, home made meal.

Preparation for tonights meal began on March 27, 2010 when I paid my $40.00 for plot 23 at the College of Southern Idaho's Community Garden. 

Recipe:
6-8 cubed potatoes
1 stalk celery sliced
1 diced onion
salt to taste
3-4 cups milk
1 to 2 T corn starch
4 tsp butter
1 T. parsley
pepper to taste

Boil potatoes till barely soft with onion and celery. Drain water and add to milk. Mash part of the potatoes to thicken soup, add 1-2 T. corn starch, butter, parsley, pepper, salt. Let simmer until potatoes are soft.

The meal in pictures...


...and the finished product was better than I had dreamed it would be... topped off with some home made guacamole dip left over from yesterday's lunch (thanks to the Martinez family) and a glass of cold Crystal Light